

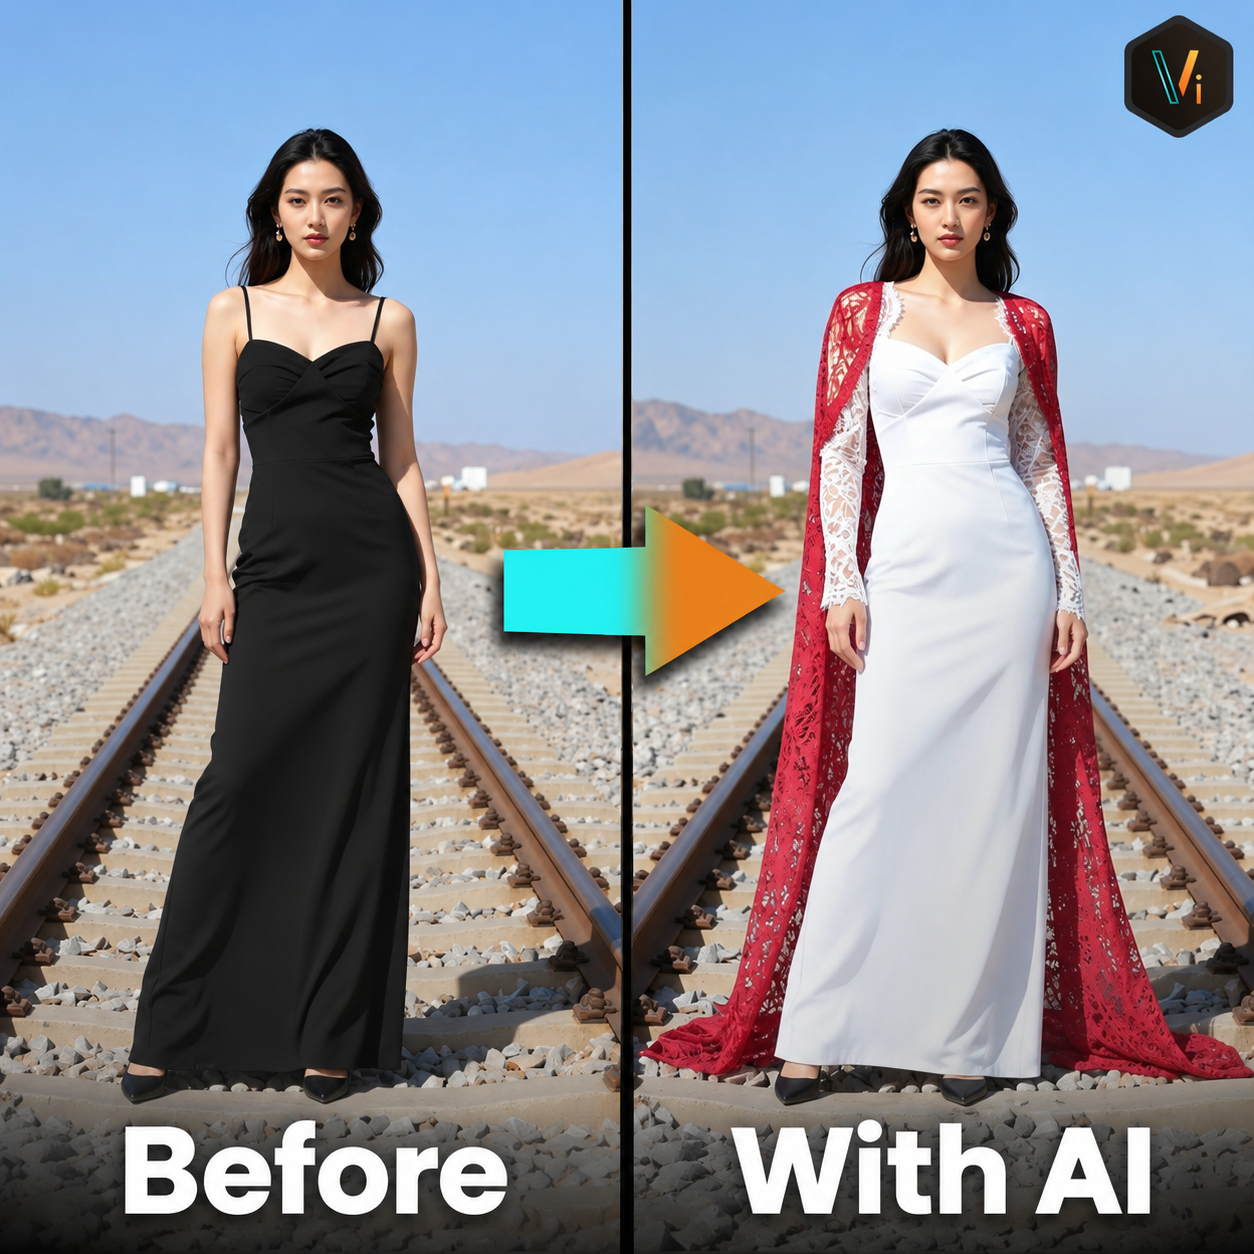
Vision FX is Distinct AI’s local, desktop AI image editor for editing and reimagining photos with natural language prompts, no cloud processing, no subscription, and no per-image credits. This tutorial follows one portrait through seven rounds of AI image editing, using nothing but plain-language prompts to build each new change directly on top of the last.
Starting from a single portrait, the edits stack up fast: a new dress color, lace sleeves and a cape, a necklace and a diamond tiara, and a completely rebuilt desert background with a throne in it. Each round uses instruction-based AI editing on top of the previous result, and for the most part, the subject’s identity and the structure of the photo hold up well along the way, the same as in the video this post is based on.
Watch the full video tutorial here: https://www.youtube.com/watch?v=qcwtpdHZ__4&t=5s
Step 1: Download your first model
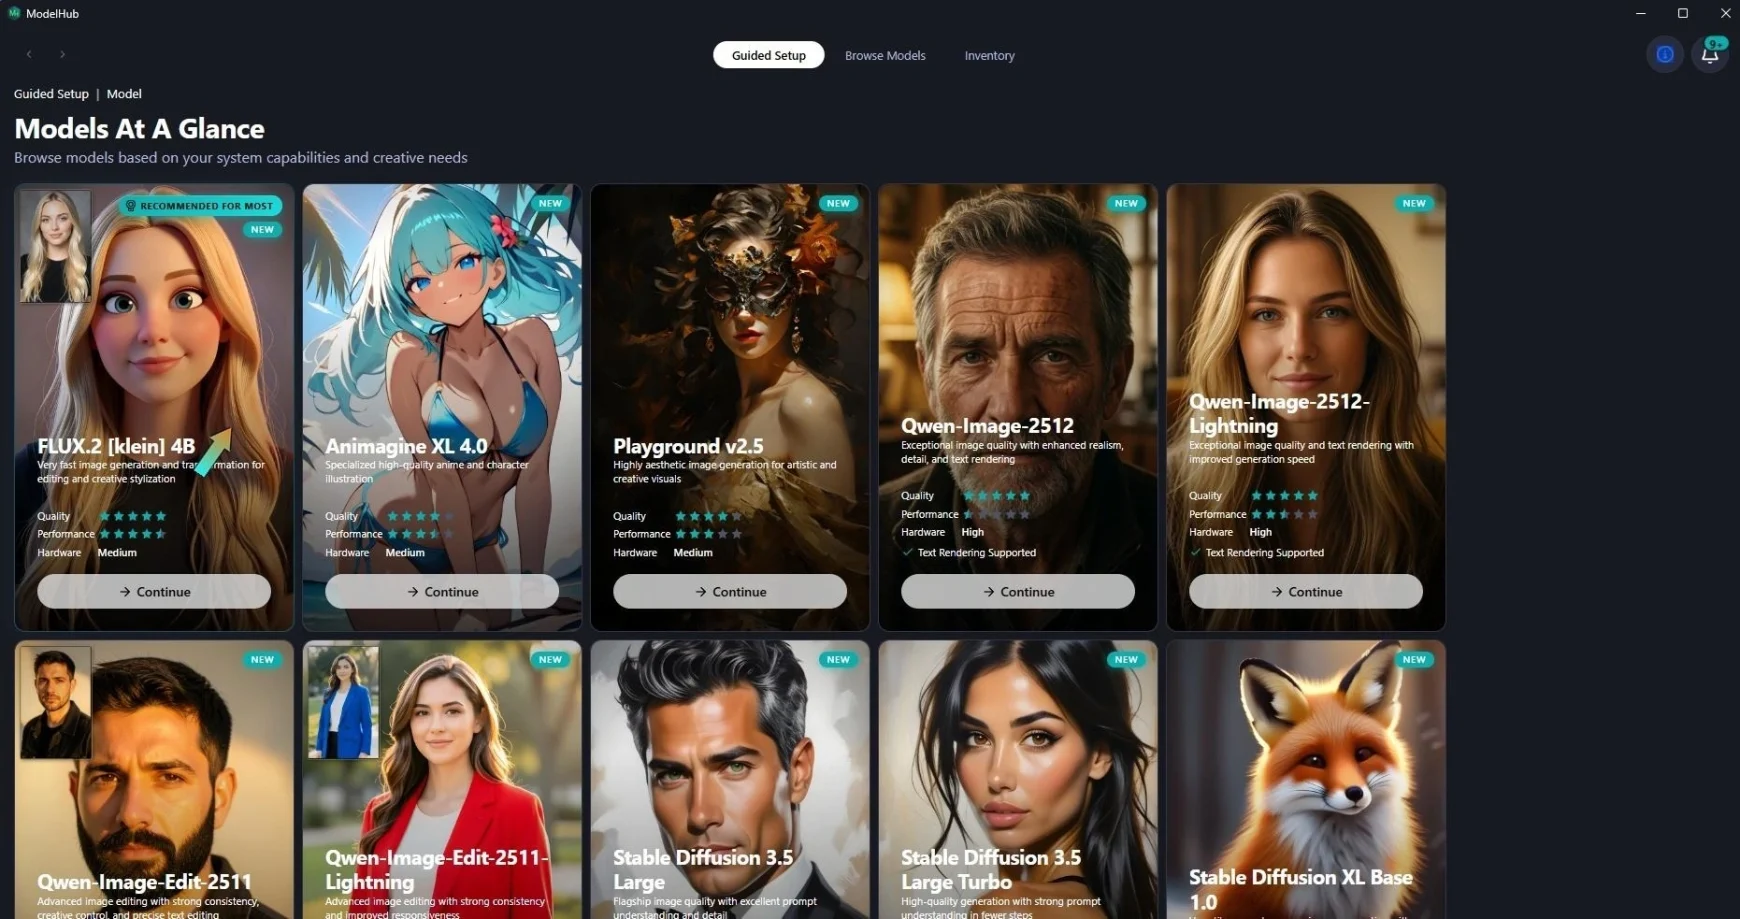
Because Vision FX is a local AI image editor that runs entirely on your own computer, it doesn’t ship with a model pre-installed. You choose and download your own local AI model. Open Vision FX, go to the Model Hub, and click Guided Setup, which reads your hardware specs and recommends AI models suited to your machine.
There are a lot of AI image models in the hub, and it’s always expanding, but Flux.2 Klein 4B is currently the best model for instruction-based AI photo editing, so that’s the one to grab for this walkthrough.
Step 2: Load the model
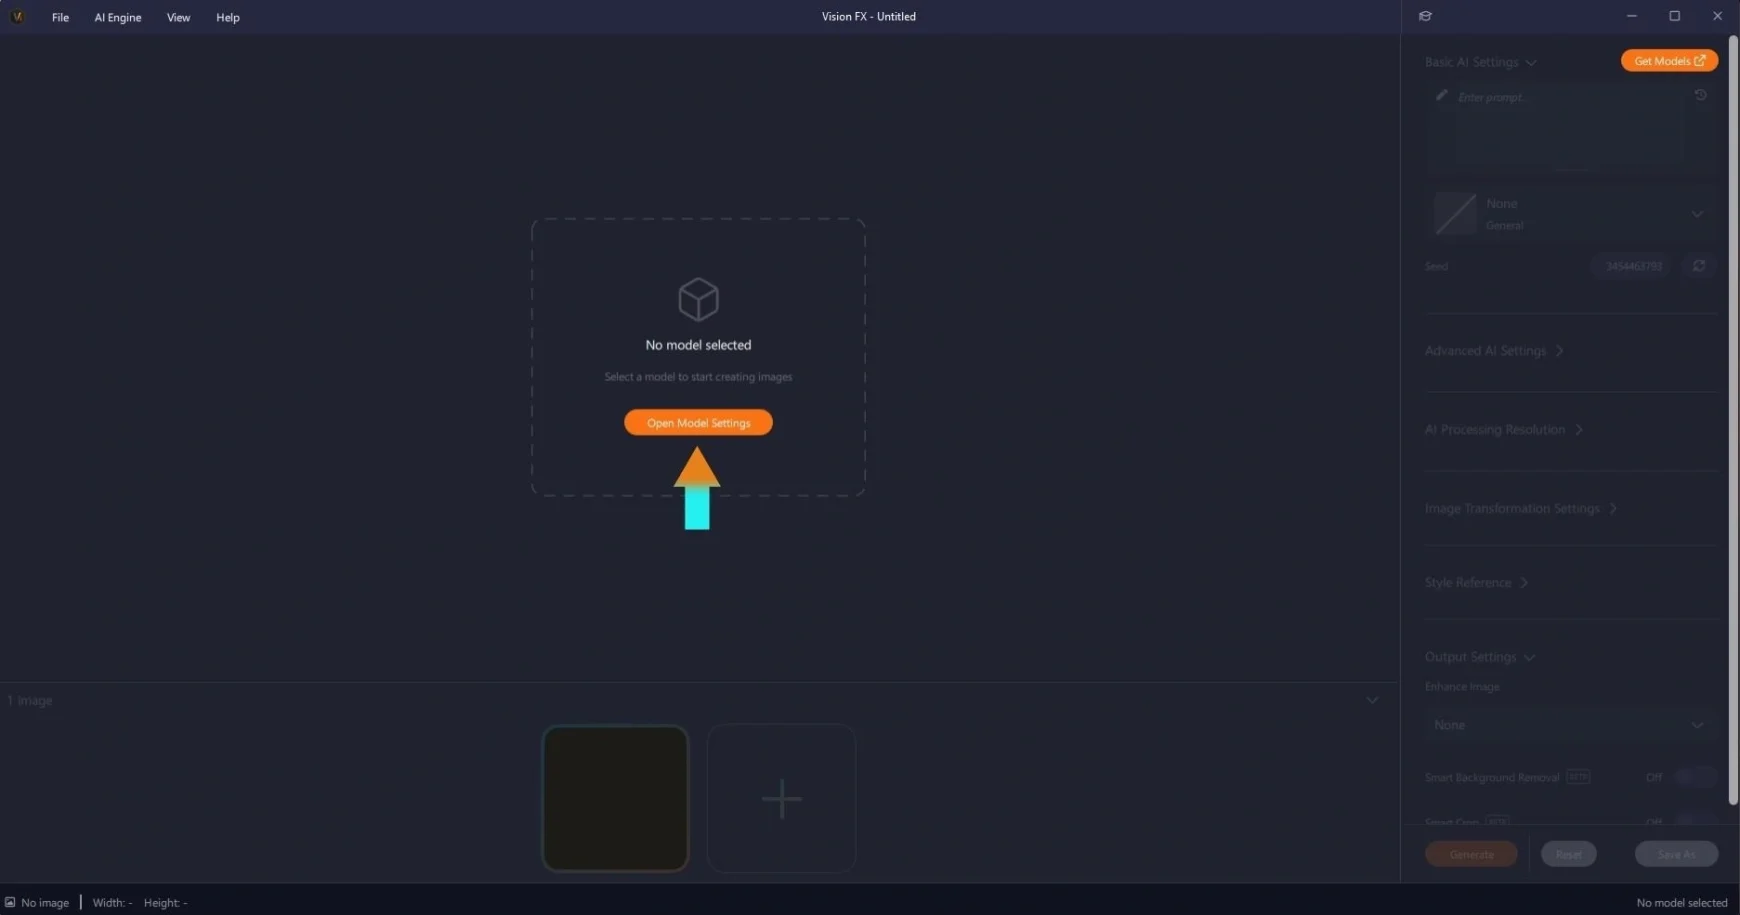
Once Flux Klein is installed, head back to the main UI. With no model loaded yet, Vision FX shows an empty canvas with an orange Open Model Settings button front and center. Click it.
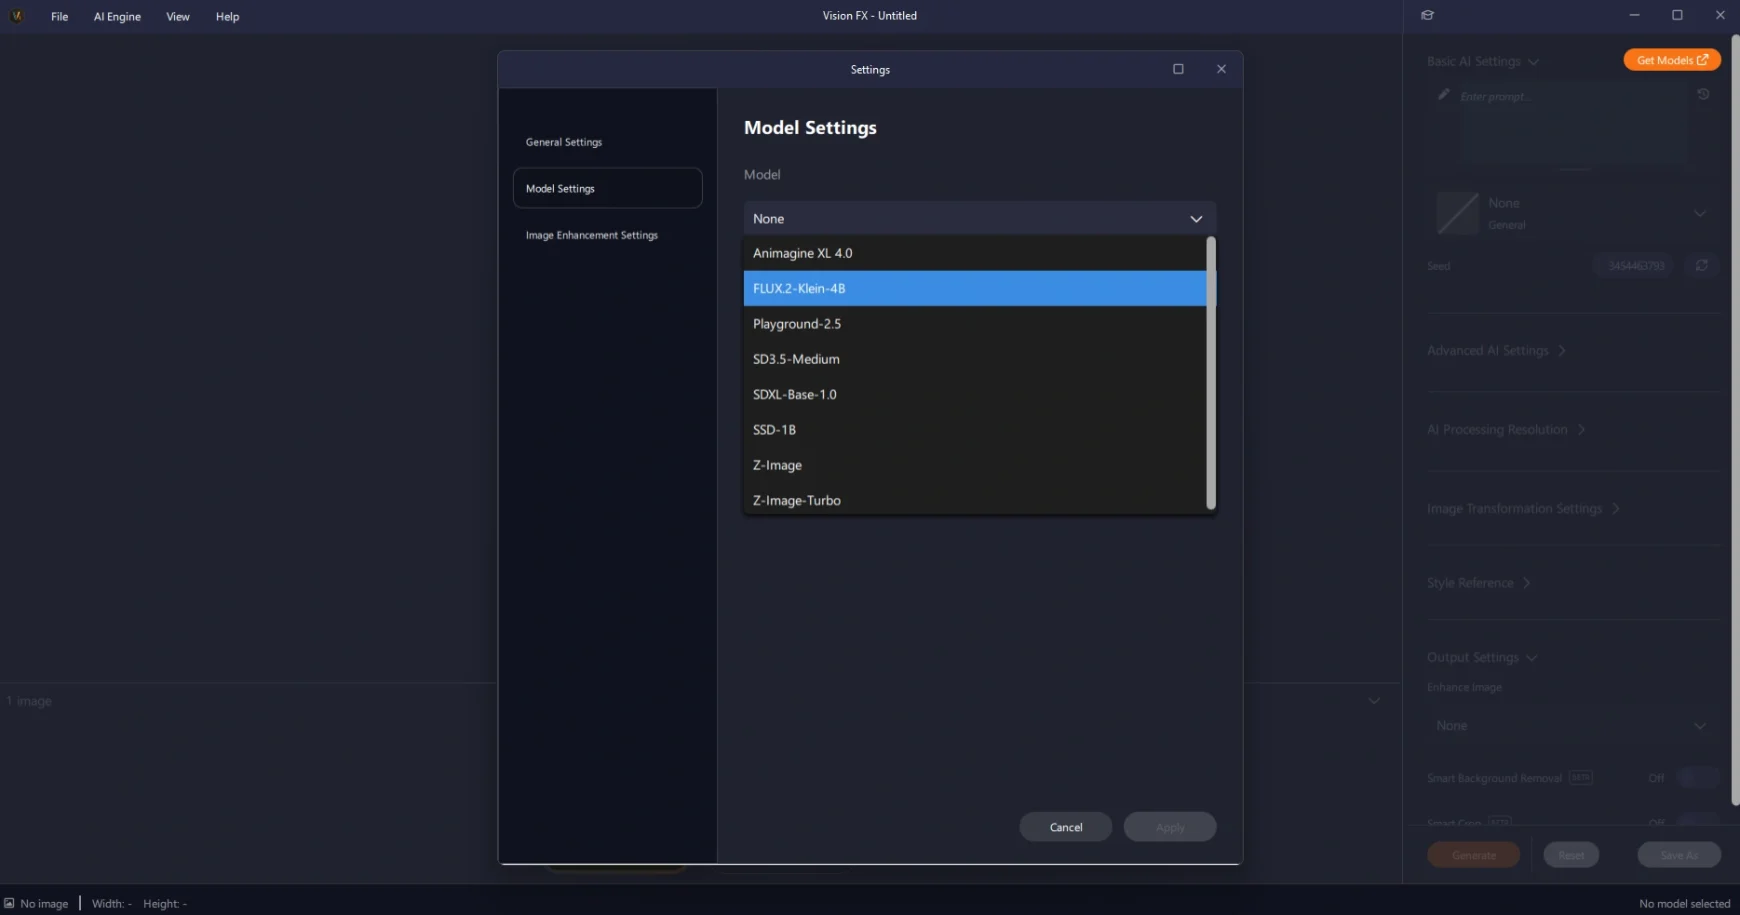
That opens Model Settings. Click the Model dropdown and select FLUX.2-Klein-4B from the list.
Vision FX checks the model against your hardware automatically. Once you see the green Compatible checkmark, click Apply.
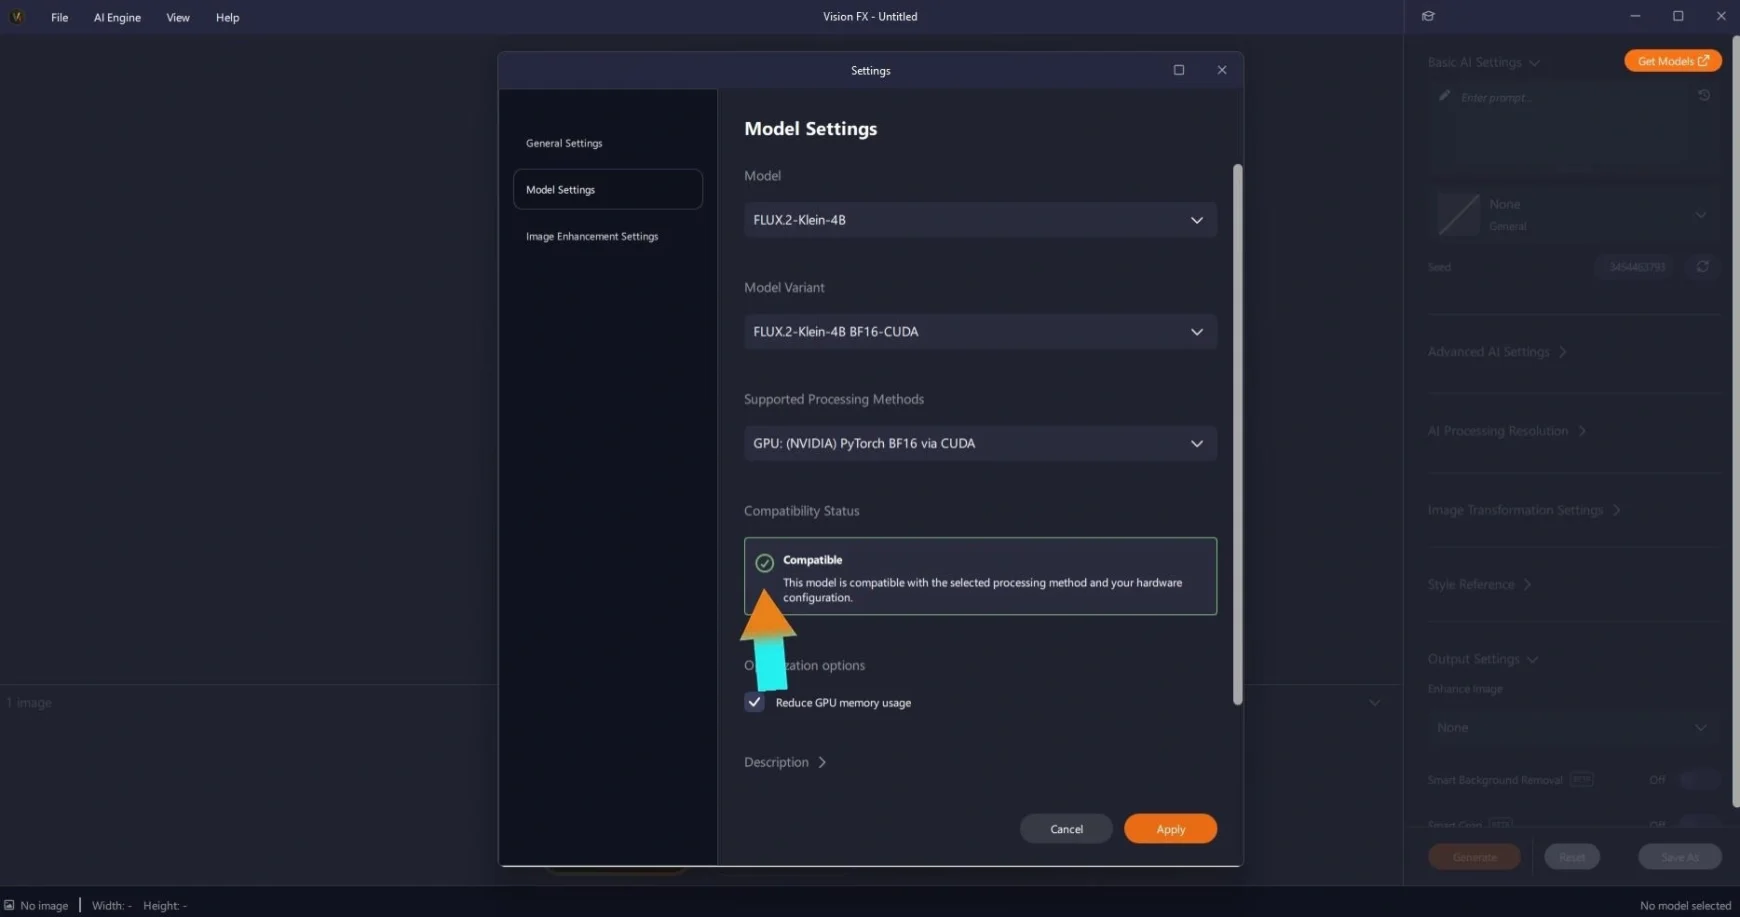
Your model is now loaded for simple, natural-language editing.
Step 3: Bring in a portrait
Vision FX is an image-to-image AI app, so the first step in any AI photo editing workflow is bringing in a starting image. This one was created in Render FX, Distinct AI’s AI text-to-image app, in an earlier session, but the same AI portrait editing workflow works with your own photos, selfies, product shots, or anything else you want to edit.
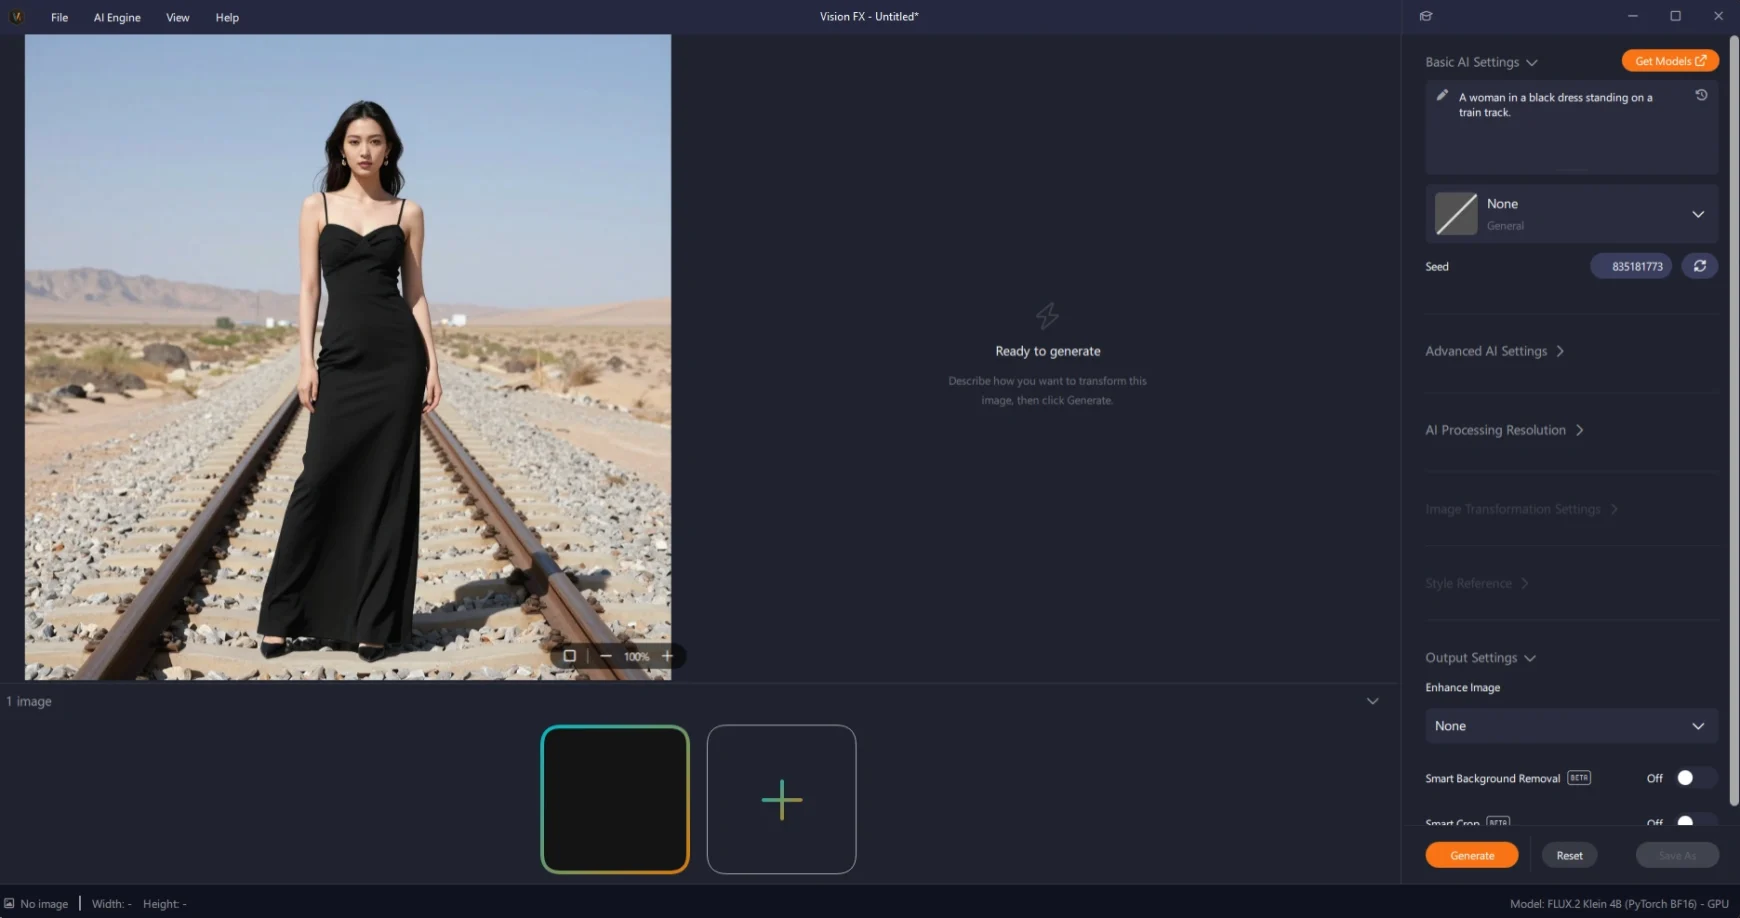
Step 4: Make your first edit
With the image loaded, a simple prompt is enough to make a real change: change her dress to white. Nice and simple.
The result: the dress is white, and everything else, her face, her pose, the rest of the image, holds close to what it was. That’s the basic loop of AI image editing in Vision FX: describe the change in plain language, and the edit lands without throwing out the rest of the photo.
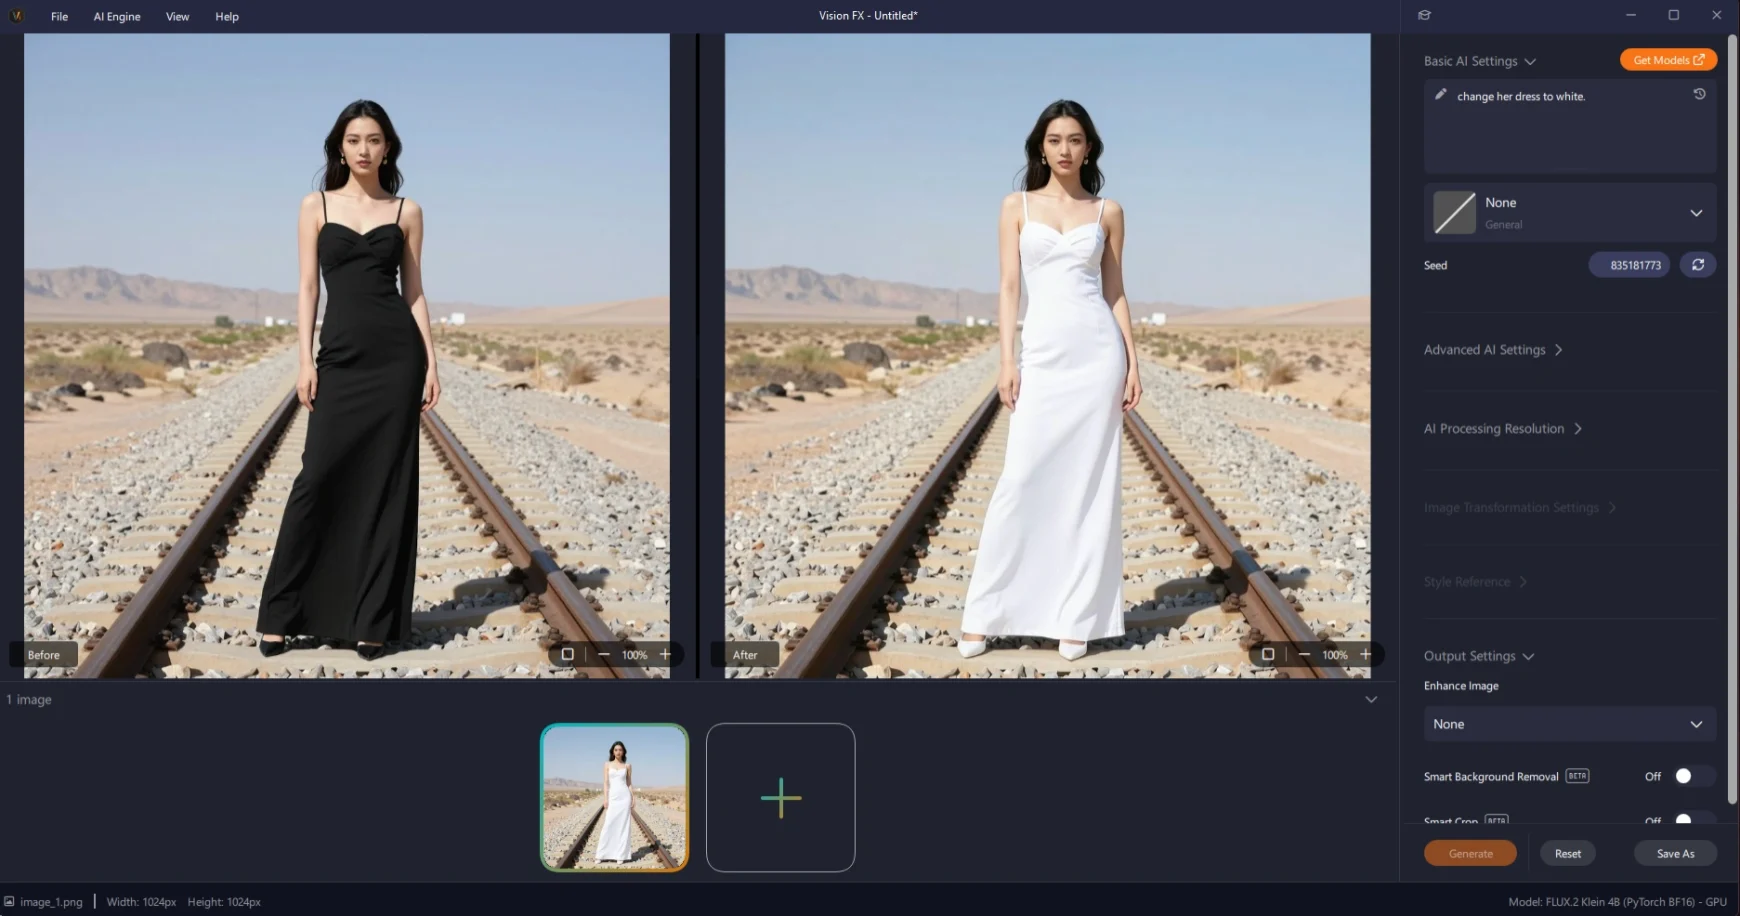
From here, the workflow is to keep building on that result rather than starting over each time. Save the current image by right-clicking it, open a new document with the + button, and drag the saved image back in as the new starting point. Every edit from here on follows that same save-and-reopen pattern.
Step 5: Edit several things at once with Batch Mode
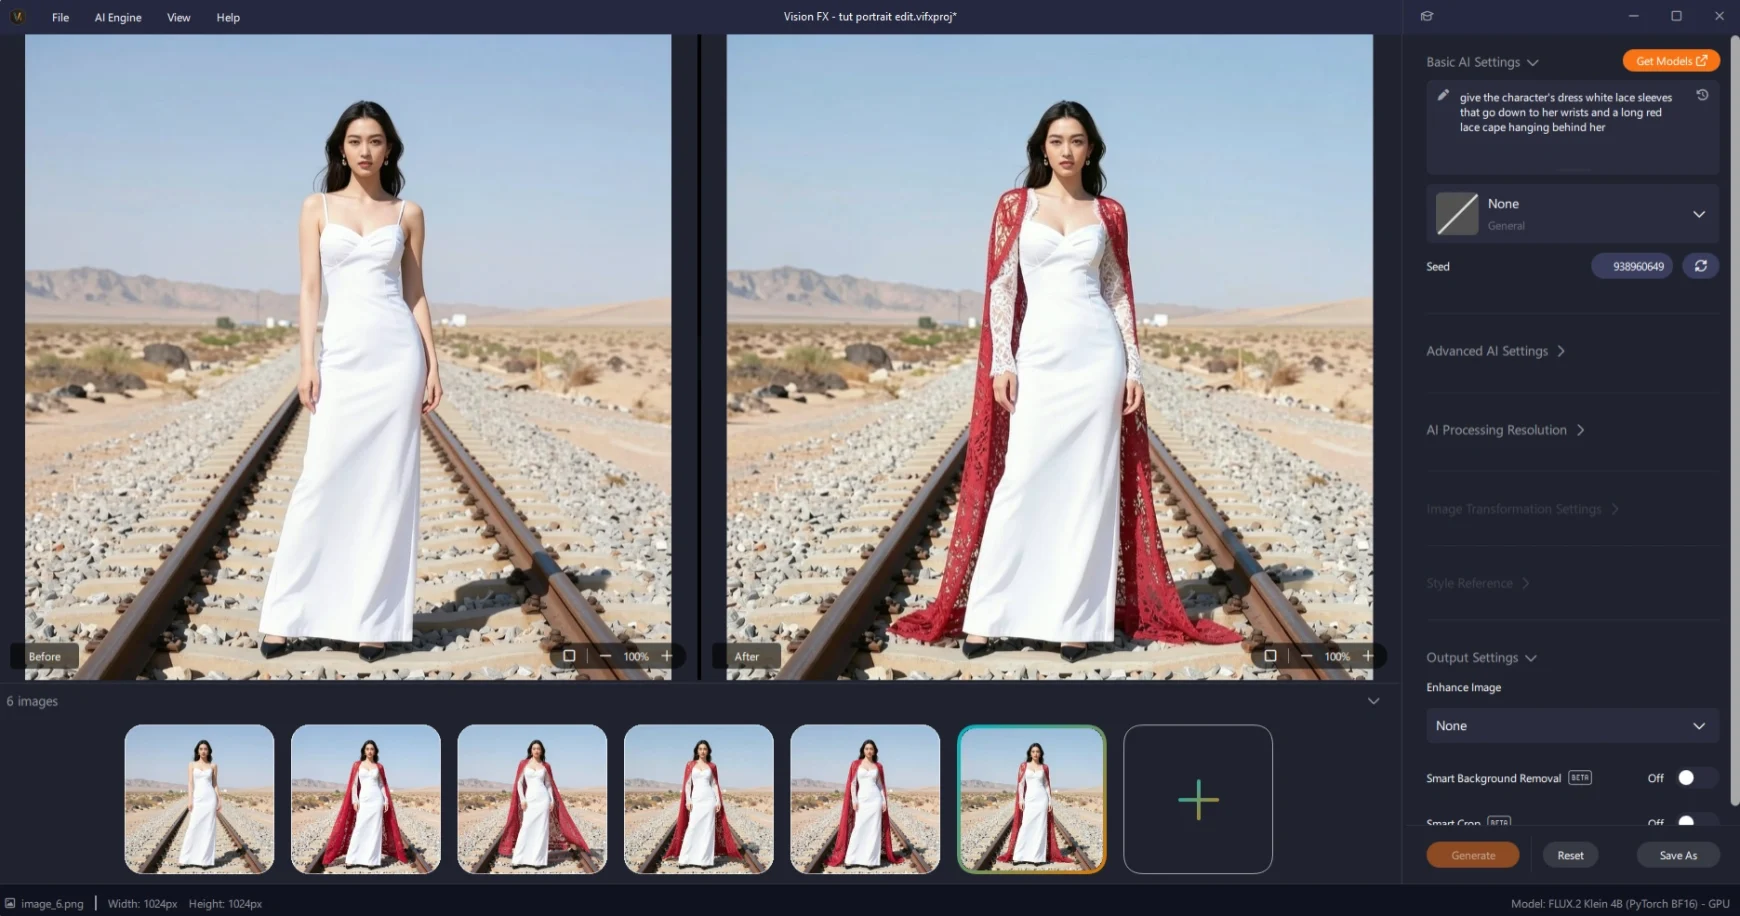
The next prompt asks for more in one go: give this character’s white dress lace sleeves that go down to her wrists, and a long red lace cape hanging behind her.
Before generating, it’s worth turning on batch mode. Under Settings, enable Image Variants. Batch AI image generation lets you create up to 50 images from a single click of Generate, one of the real advantages of local AI image editing: no per-generation cloud credits, no subscription, everything running on your own computer.
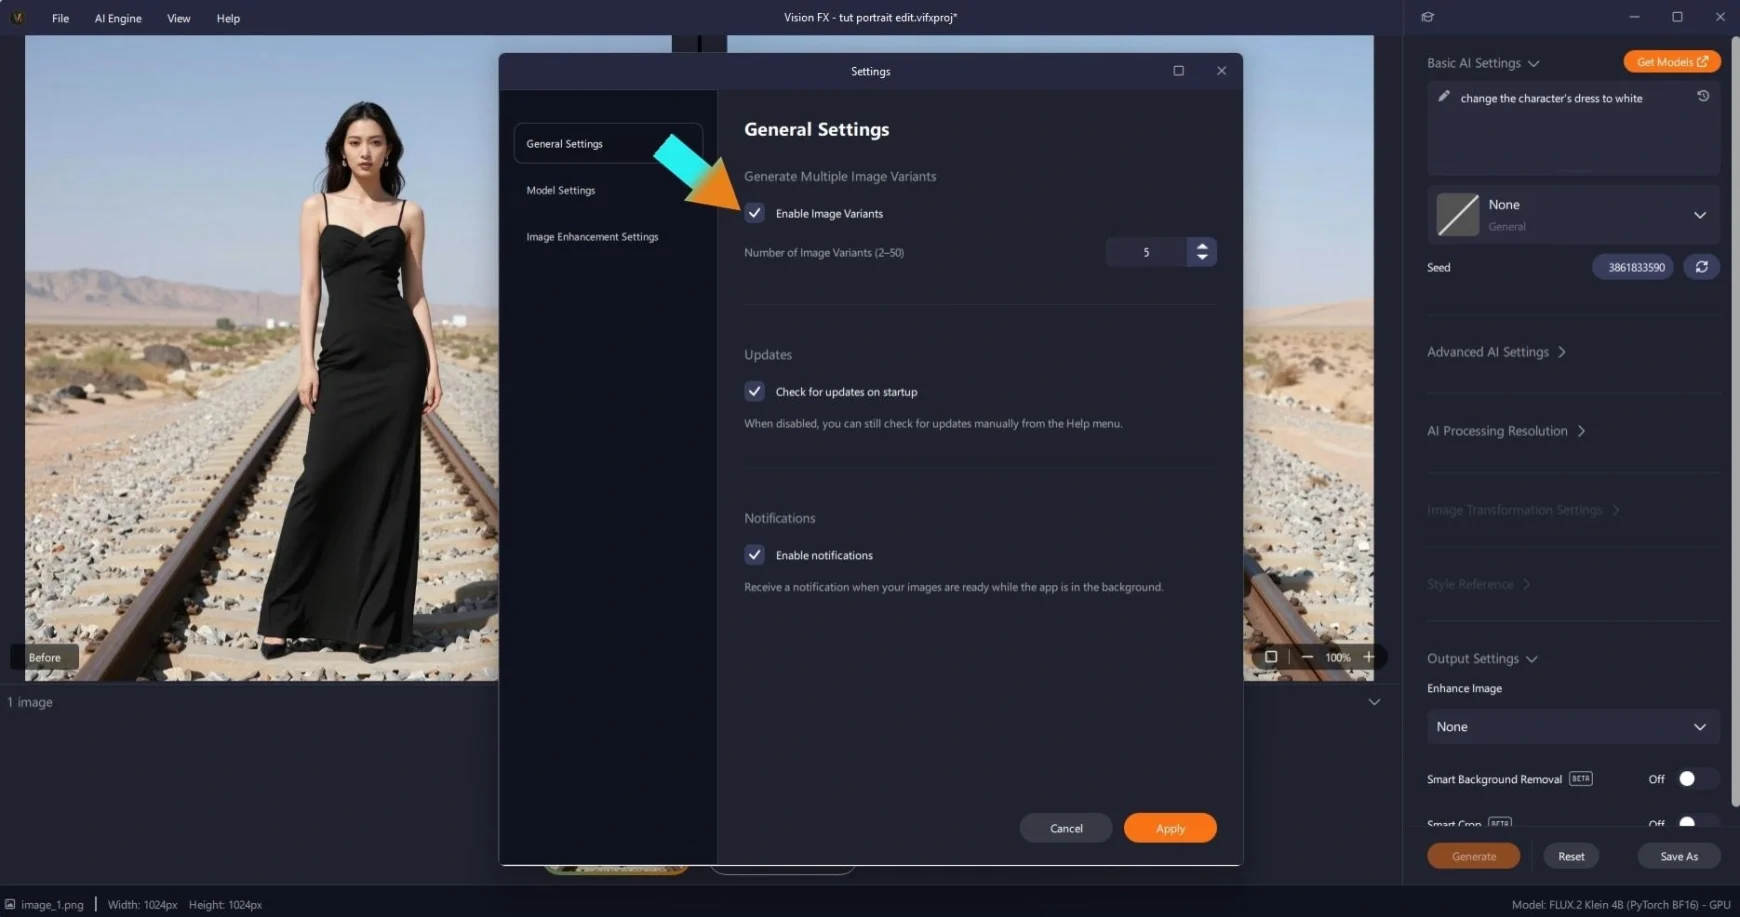
Batch mode is especially useful for AI product photography and building a visual identity for a brand, or, like here, just testing out different takes on an AI-edited photo of yourself or someone else. Generation speed on this hardware runs about 10 seconds per image, so a full batch of AI image variations comes back fast, and without any per-generation cost.
The result: five image variants of the requested edits, each with its own nuanced differences, everything from small changes in how the sleeves fall to how the cape drapes.
Step 6: Build on it again: Add a necklace and tiara
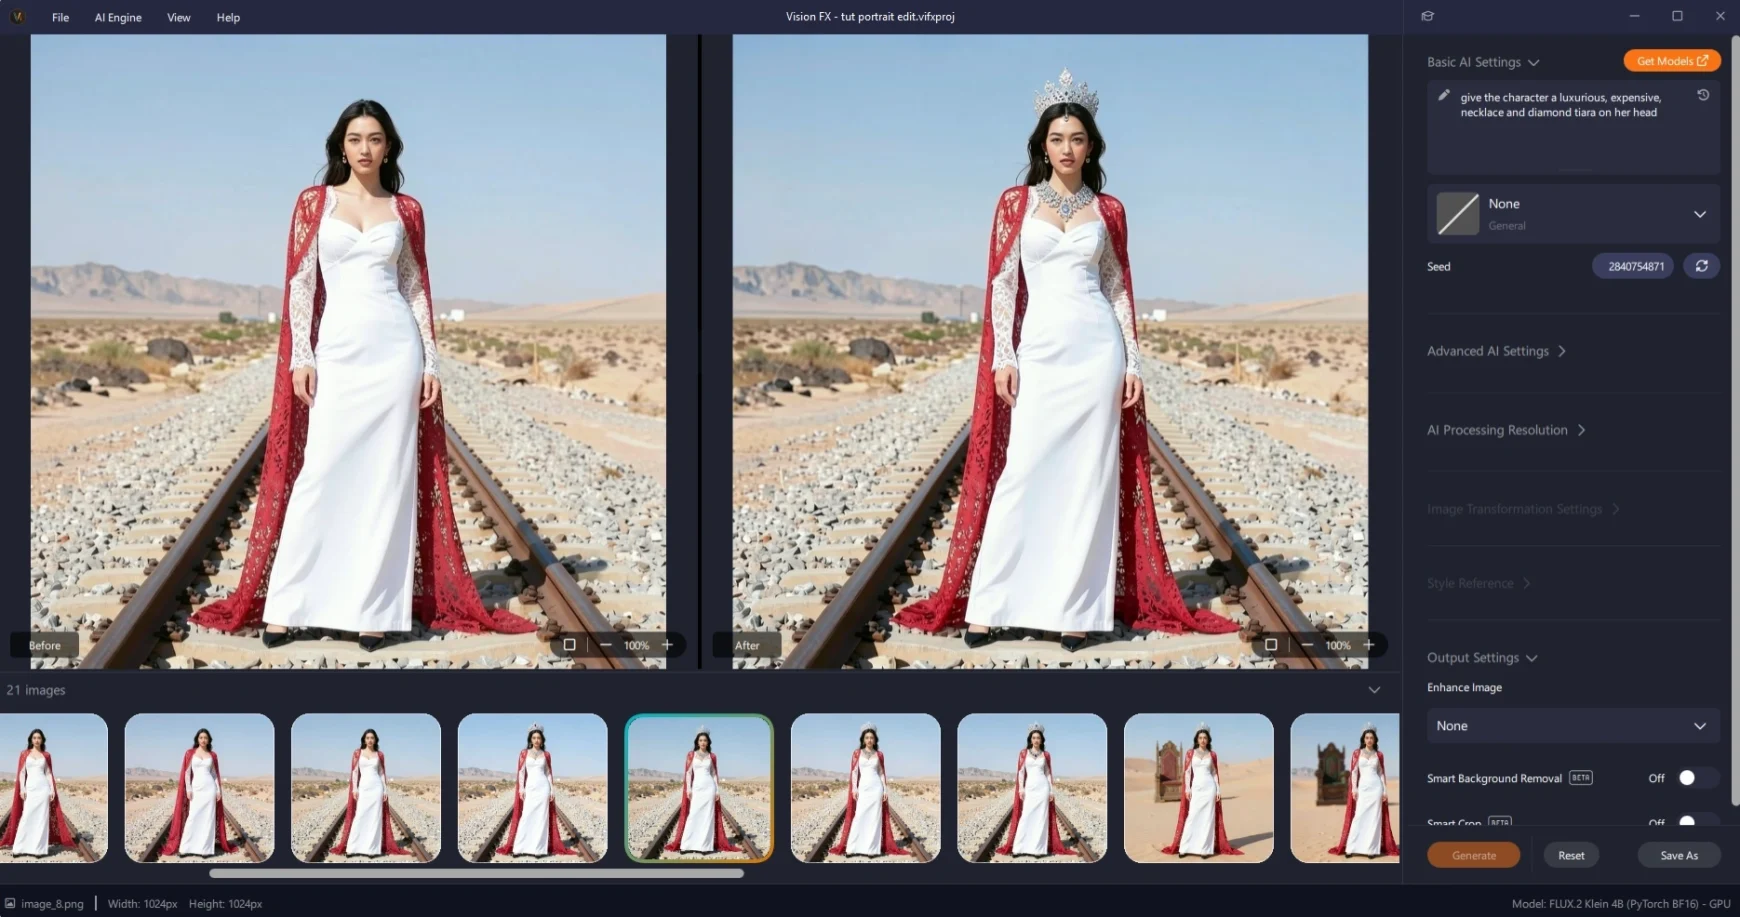
Pick a favorite from the batch, save it, and bring it back in as the new starting image. The next prompt adds detail: give this character a luxurious, expensive necklace and a diamond tiara.
With batch mode still set from before, this generates five more variations, each with its own take on the necklace and tiara. One of them stands out as the clear favorite.
Step 7: Refine with precise, specific prompts
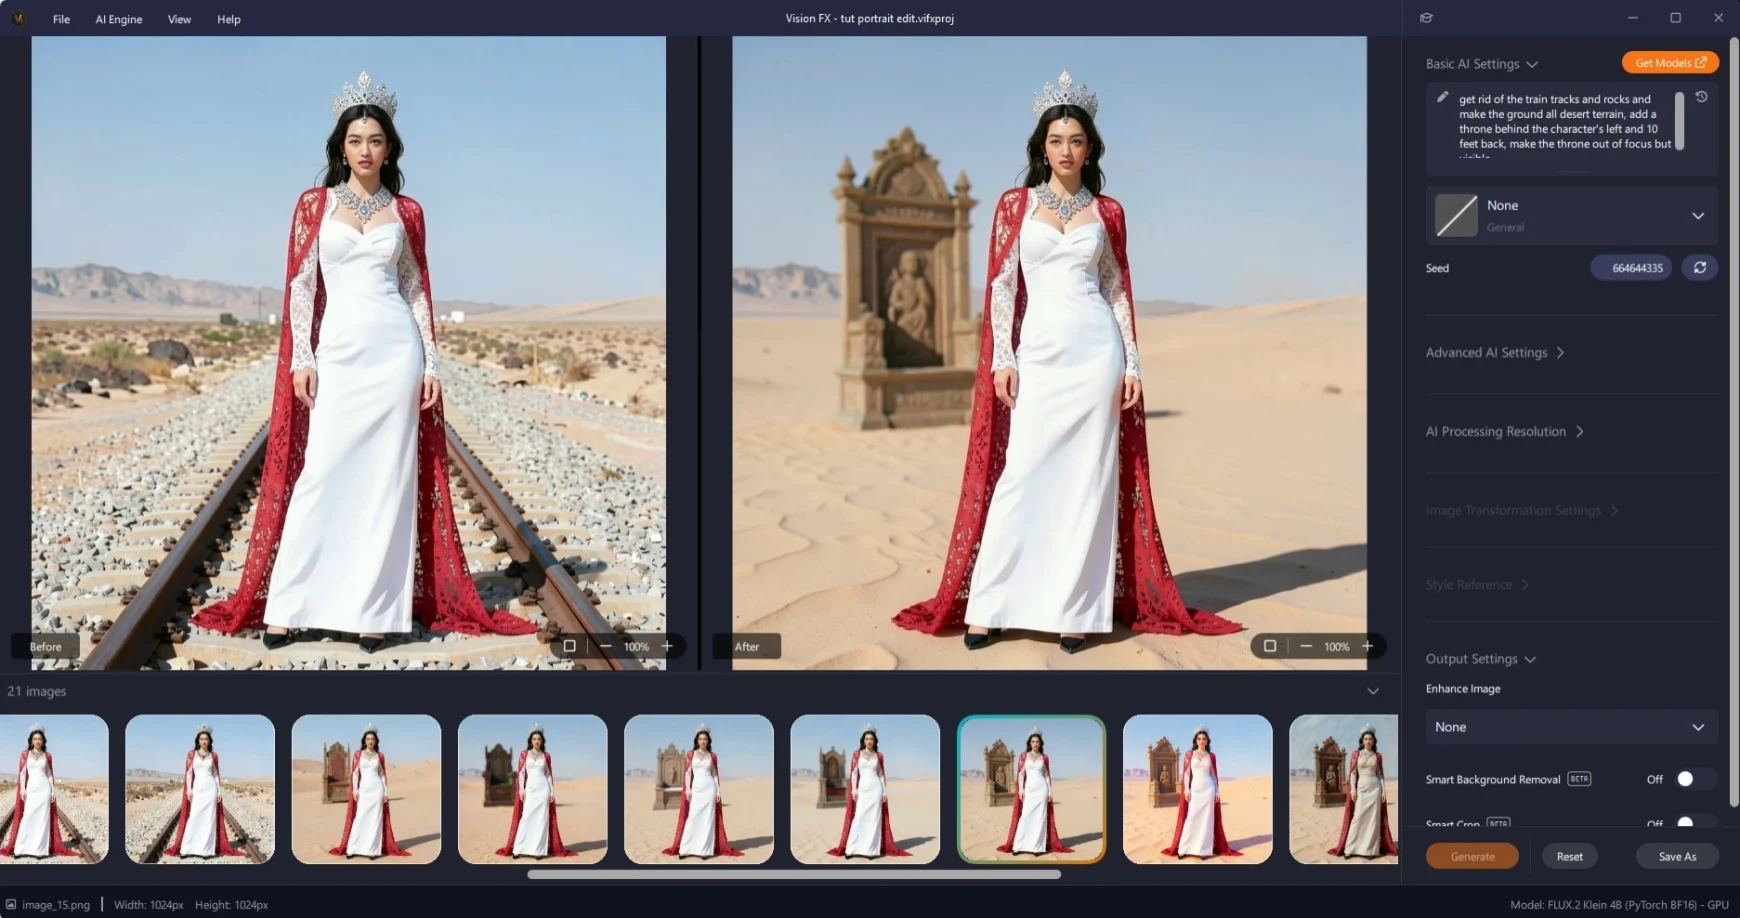
Save the favorite and bring it in one final time for a more detailed instruction, this time aimed at the background rather than the subject: get rid of the train tracks and the rocks, make it all desert, add a throne behind the character’s left and ten feet back, and make the throne out of focus but visible.
That’s a lot of specific, spatial detail in one prompt, distance, placement, focus, and the AI image results follow it closely. The throne lands where it was asked to, at the right distance, correctly out of focus, with a handful of different looks to choose from. It’s a good demonstration of how this AI photo editing workflow scales to product photography too: not just generating a product image, but generating deliberate AI image variations of it to pick from.
A few notes on AI image editing prompts
That’s the full workflow for how to edit a portrait in Vision FX: bring in an image, describe a change in plain language, and build on the result using instruction-based AI editing. A couple of things worth remembering as you try it yourself.
The quality of your AI image prompt is directly responsible for the quality of your output. It’s worth experimenting with both ends of that: short, concise prompts, and longer, more detailed ones, including prompts you design with help from an LLM like ChatGPT or Claude. Try both and see what each style gets you.
Try it yourself
Editing a portrait, or any photo, with AI comes down to describing what you want changed in natural language and building one edit on top of the last. Bring in your own photo, start with one simple AI edit, and see how far you can take it using Vision FX’s local, private, no-credits AI image editor. Drop your questions or comments below, and go make something cool.
Learn how to get started with the Distinct AI product line-up or explore the rich features built into each product.